 Shop On-Line at the Art of Essex
|
Lesson
Plan: Crayon Etching
Teacher: Mr. Essex Garner,
Saint Joseph Catholic School, Jefferson
City, Missouri
Cooperating Teacher: Mrs. S. Weber
Unit: Making Art – Color design, Etching/Drawing Techniques - History and Art
History integration
Grade Level: Elementary, Middle School, and High School (2 - 8) -
Adaptable to higher and lower grades.
|
Missouri Standards for Teacher Education Programs
(MoSTEP)
1.2.2.2 Strengthens prior knowledge with new ideas. 1.2.2.3 Encourages student responsibility. 1.2.3.4 Connects instruction to students' prior experiences and family, culture, and community. Standards:
Performance Indicators:
1.2.4.1 Selects
and creates learning experiences that are appropriate for curriculum goals,
relevant to learners, and based upon principles of effective instruction (e.g.,
encourages exploration and problem solving, building new skills from those
previously acquired).
1.2.6.2 Manages
time, space, transitions, and activities effectively. 1.2.9.2 Uses resources available for professional development. |
 |
Grades: 3-8
Ages: 7-12
Strand
(Know about Art), (Making Art) and Elements of Art
Objective
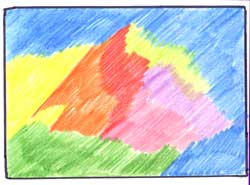
Students will be working in techniques of line, curves, etching and drawing. Using primary,
secondary and intermediate colors to make complete background formats
(Preparation of Surface Areas). Students will make a complete etch drawing of a
famous artists work of art.
Younger students will enjoy exploring with this activity while older students should be encouraged to investigate detailed images and patterns.
What You Need:
- Paper (Bristol board [poster board] works best)
- Crayons
- Popsicle stick or nail
What You Do:
|
Step One: Take a small piece of drawing paper (4"
x 5") or (8 ½” x 11”). Cover the paper with a layer of bright,
light-colored erasable crayons. Use even, firm pressure. You can make it all
one color or create a pattern of different colors. Don't press too hard or the
next layer won't cover well. Fill the paper with crayon shapes and patterns making sure to press hard. It is best to use light colors at this stage. |
|
| Step Two:
Now color over the first layer of color with black erasable crayon.
Presses firmly to completely
cover the colored layer. Once you have filled the paper with crayons
patterns, color
heavily over the whole paper using black crayon.
Plan out a picture or design and using the Popsicle stick or
paperclip, The light colors will show through where you scrape away the
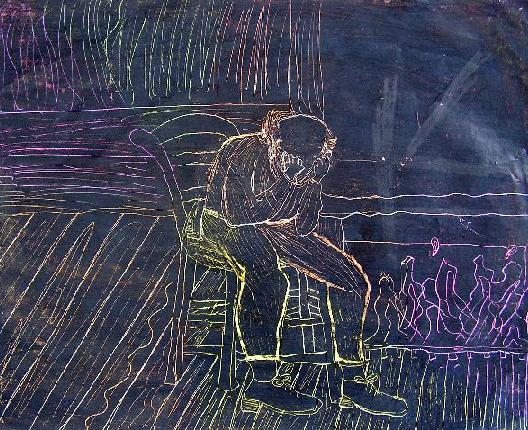
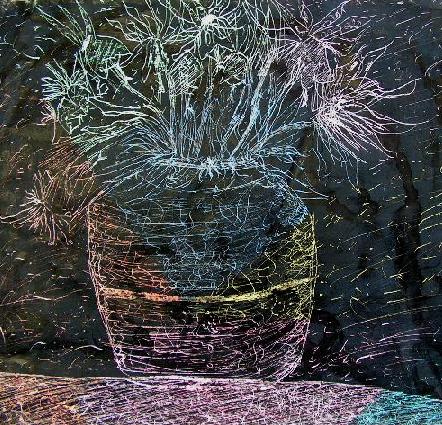
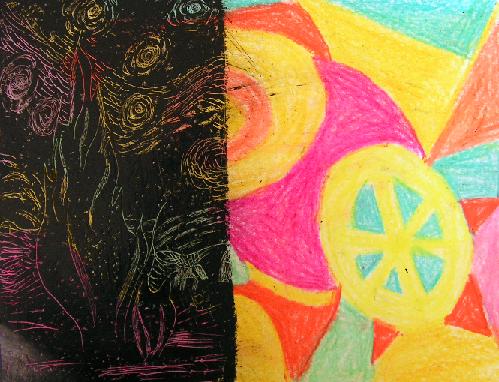
black. Beginning design for Starry Night Etching (Right) (Suzy Weber) |
|
Step Three:
Think of what you want to draw. Simple objects with interesting lines work
best. You may
want to sketch it first. Looking closely at the object will help you see
the interesting lines, patterns,
textures
and
other details.
|
Step Four: Use a variety of drawing tools to draw different lines, patterns and textures. Try toothpicks, unbent paper clips, nails, screws or other tools that will scrape through the black layer without tearing the paper. Draw gently! If you make a mistake, reapply the black crayon to cover it up! Assessment is completed through the attached rubrics for this assignment.
Example Student Art Work (Starry Night) |
 |