Shop On-Line at the Art of Essex 

Paper Mache Masks Lesson Plan
(Spanish) Leccion Plan para Mascaras de Papel Mache

Grades: 6 and Up
Ages: 12 and Up


Teacher: Mrs. Suzy Weber and Mr. Essex Garner, Saint Joseph Catholic School, Jefferson City, Missouri
Cooperating Teacher: Mrs. Suzy Weber


Unit: Paper Mache Masks – Use of Color and Materials Techniques – Multicultural and Historical Integration.
 

Grade Level: Elementary and Middle School (6th through 10th Grades) - Adaptable to higher.


Strand (Know about Art), (Making Art) and
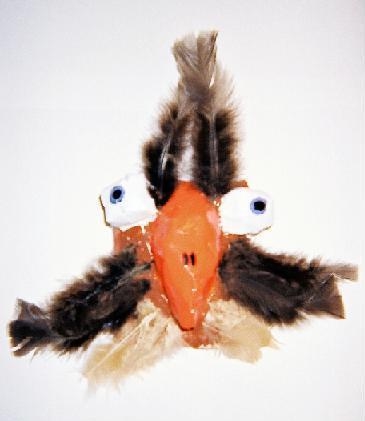
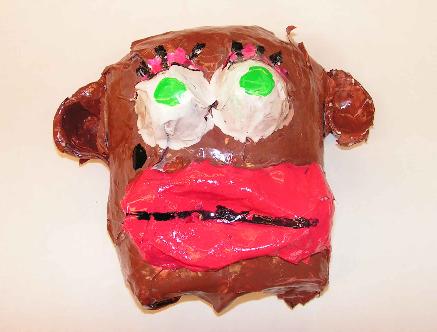
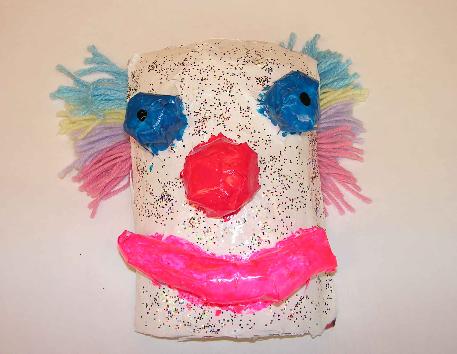
 Elements of Art

Objectives: Artistically, masks are among the most remarkable objects created by traditional civilizations.
 

During this 4-week session, students will construct a mask as they begin exploring the imaginative

power of this exciting art form.

Mask to the right created by Saint Joseph Elementary Art Student 6th Grade


What You Need:

  • - Powdered wallpaper paste (in a box from the hardware store)
  • - White glue (just a little)
  • - Warm water
  • - Bucket for mixing
  • - Small containers (for paste at tables)
  • - Newspapers
  • - 2" wide masking tape (4-6 rolls)
  • - Thick Bristol board or poster paper (about 1/2 sheet per student)
  • - Scissors
  • - Acrylic paint (and containers to put it in)
  • - Brushes
  • - Containers for water
  • - Hot glue gun and glue sticks
  • - Found objects to glue onto masks (beads, fabric, string, plastic bubble  wrap, etc.)
  • - Possibly a completed mask as an example


\

What You Do:


DAY ONE

  1. -    Talk about masks ... what kinds of mask are there? Why do people make masks? how do masks make us feel? (happy, sad, scared, etc.)
     
  2. -    Show examples of different sorts of masks from different cultures. If possible show real masks ... if you do not have any masks, try to find pictures of masks in books, on posters etc.
     
  3. -    Prepare by having your students rip up newspaper strips of various lengths that they will later add to their poster paper when the time comes. Store these pieces of paper in a small box -- one per student or pair of students if possible.
     
  4. -    Students first draw, and then cut simple shapes out of the poster paper. These shapes will be added to the masquerade mask using masking tape.
     
  5. -    Make sure that the tape covers all joining areas front and back.
     
  6. -    Mix up paper mache mix as directed on wallpaper paste box. Add a touch of white glue to make the mixture nice and sticky.
     
  7. -    Cover the mask with newspaper strips of various lengths that have been dipped in the paste. The paste should have the consistency of thick yogurt. The mask should have between four and six layers by the time it is completed.

*You might wish to have the students do the front one-week -- let it dry -- and the back the following week. It makes things a lot easier for them.


DAY TWO

Continue to cover the mask with newspaper strips of various lengths that have been dipped in the paste. The mask should have between four and six layers by the time it is completed.

DAY THREE

Once the mask is completely dry (you may need to wait a few days to a week for this to be so), your students can decorate their masks with acrylic paint and then leave to dry for another week.

DAY FOUR

On the final day, embellishments can be added with hot glue (supervision for the young ones) and a string can be attached so the mask can be worn.
 

If there is time, students may want to plan a short play. You might want to take pictures.


 The Art of Essex Home

Painting Gallery One
 
Unfinished Business

Dreams Not Deferred

In My Father's House Water Color Gallery

Water Color Gallery One

Chalk Art 2007 Memorial Park

Chalk Art 2008 Memorial Park

Future Exhibits

Wall Graphics Kansas City Missouri

Constructivist Period and Art Research Center

Reading Writing & Arithmetic Christian Academy

Mixed Media

Memorial Hall Lincoln University Campus Jefferson City Missouri


Float Building 101 and the 135th Signal Battalion